When we deploy any app (for example WordPress site) on Microsoft Azure, it is typically assigned a default domain like yourappxyz.azurewebsites.net. While this domain is functional, using a custom domain in Azure (like www.yourdomain.com) enhances your app’s branding and makes it more accessible to your audience.
To truly make your brands’s online presence, you’ll want to replace that generic azurewebsites.net domain with your own custom domain. Azure App Service makes it easy to map your own domain name to your application, providing a professional look and boosting credibility.
In this tutorial, we’ll take you through the steps of adding a custom domain to Azure App Service.
Topics we covered in this article:
Why Use a Custom Domain?
Using a custom domain in Azure for your Azure hosted app offers several benefits:
- Brand Recognition & Credibility: A custom domain looks more professional and trustworthy than a generic Azure-provided domain. A custom or personalized domain name is easier to remember and builds trust with your audience.
- SEO Advantage: Custom domains are better for search engine optimization (SEO), as they create a unique identity for your website, improving rankings.
- Professional Appearance: Having a custom domain makes your website look more credible and professional, which can help attract more visitors.
- Easier to Share: Custom domains are much easier to share and promote across different platforms like social media, email marketing, and print advertisements.
Prerequisites
Before we dive into adding a custom domain in Azure, ensure you have the following:
- Azure Account : You must have have active Azure account. If you do not have any, create a free Microsoft Azure account & get a $200 credits for the first 30 days.
- Azure App Service: You need an live running app hosted on Azure App Service.
- Custom Domain Name: You need to have purchased a domain name with any extensions (like .com, .in, .org, etc.) from a domain registrar (like GoDaddy, Namecheap, etc.).
- DNS Configuration Access: You should have access to your domain registrar’s DNS records settings to make necessary updates.
How to Add a Custom Domain to Azure App Service
Step 1: Access Azure Portal
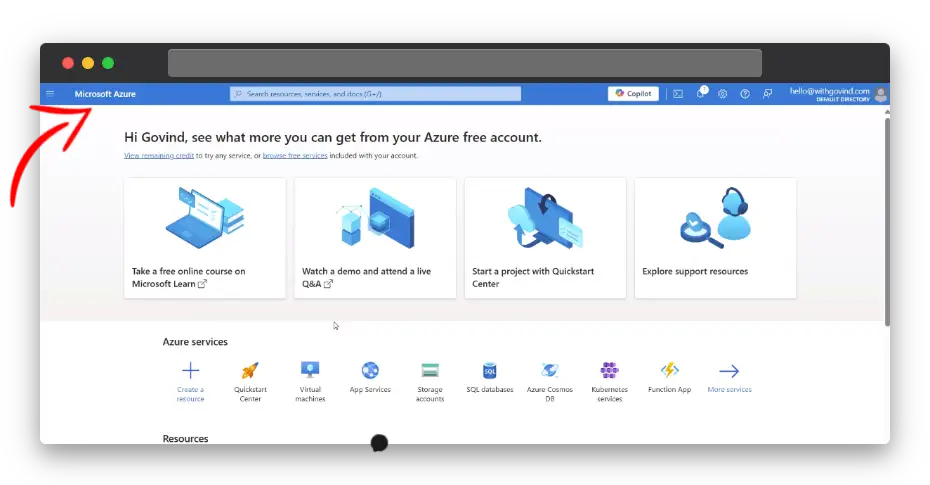
The first step is to log in to your Azure Portal. Once logged in, go to your App Service by clicking on App Services from the left-hand top menu or by searching for it in the search bar.

Step 2: Select Your App Service
From the App Services page, select the app for which you want to configure the custom domain name. This will open the app’s Overview page.
Step 3: Navigate to Custom Domains
On your app’s Overview page, scroll down and look for the Custom domains option. You can also find it in left side Settings section of the menu. Click on Custom domains to open the custom domain management page.
Step 4: Add Custom Domain in Azure
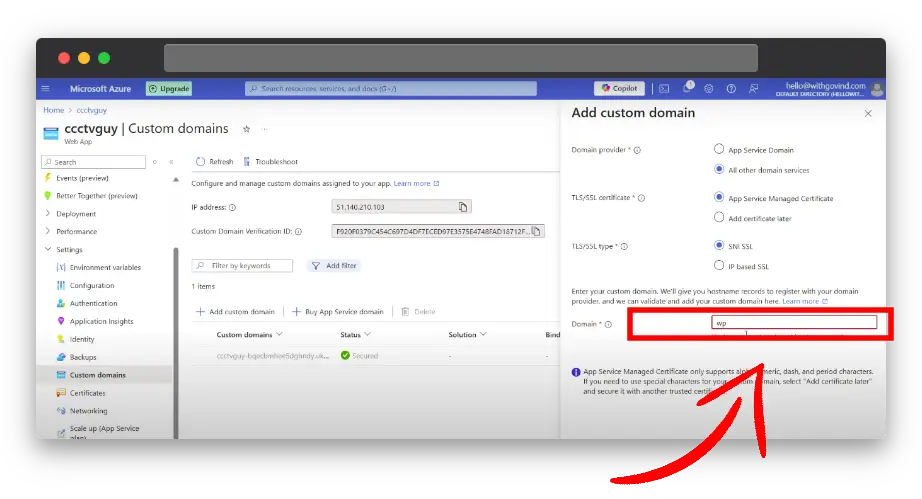
In the Custom domains section, you’ll see an option to Add Custom Domain. Click on it, and a new window will appear, asking for your custom domain name.
For example I used my subdomain wp.cctvguy.online (I took the screenshot early, so it is showing only initial (wp), but you have to type full domain name like example.com or wp.example.com)

Step 5: Domain Validation & Verify Domain Ownership
You’ll need to prove that you own the domain name. To validate your domain ownership, Azure will give you the below two host records, which you have to add to your domain registrar.
- CNAME Record: You will be asked to create a CNAME record in your domain registrar’s DNS zone settings. The CNAME will map to your Azure app’s default domain (e.g., yourappxyz.azurewebsites.net).
- TXT Record: You will also need to verify ownership with a TXT Record. You’ll be provided with a TXT value that must be added to your domain’s DNS settings.
Optional: A Record: If you want to set up an A Record (which points directly to an IP address), you can also add it.
However Azure will validate and map to your custom domain using CNAME and TXT records.
Step 6: Configure DNS Settings at Domain Registrar
To configure the DNS records, follow these steps:
- Log in to your domain registrar: Go to your domain registrar’s website (e.g., GoDaddy, Namecheap) and log in to your account.
- Navigate to DNS settings: Once logged in, find the DNS management section for your domain.
- Add CNAME Record: For CNAME record for verification, create a new CNAME entry.
- Name: This will usually be www (or another subdomain you wish to point).
- Value: Enter the Azure App Service URL or value provided by Azure (e.g., yourappxyz.azurewebsites.net).
- Add TXT Record: Create a new TXT entry.
- Name: This can often be left blank or as @.
- Value: Copy the TXT value provided by Azure.
Step 7: Domain Validation & Add Custom Domain In Azure App Service
After configuring the DNS records, return to the Azure portal. Click on the Validate button under the Custom domains section to confirm that the DNS records are properly set up. This process may take few minutes to propagate the DNS records.
Once the domain is verified, Azure will confirm that validation is passed.
Now you have to click on “Add” to bind or add the custom domain to your Azure App Service.
You’re all set! Your custom domain has been successfully connected to Azure App Service. To verify, open your custom domain in a new browser window, and you’ll see your Azure App site loading with your domain name.
Watch Video Tutorial on YouTube
Watch the video version of this tutorial on YouTube for an easy-to-follow guide.
Conclusion
Adding a custom domain to Azure App Service is a simple and straightforward process that offers numerous benefits. Not only does it give your app or site a professional appearance, but it also boosts your SEO performance, enhances your brand identity, and builds user trust. By following the steps outlined in this guide, you can easily map your custom domain to your Azure application and take full advantage of Azure’s cloud infrastructure.
With a custom domain in azure, your Azure app will be more accessible, recognizable, and ready to grow.


