If you’re looking to explore and learn cloud services or want to experiment with Microsoft Azure, creating a Free Azure account is the perfect starting point for you.
With the Azure free tier, you get access to a wide range of services for 12 months, along with some resources that are always free. In this article we will help you create Azure free account.
Topics covered in this article:
What is Azure?
Azure or Microsoft Azure is Microsoft’s cloud solution which help businesses and developers build, manage, and deploy web applications across the global network of data centers.
Azure offers a wide range of solutions such as virtual machines, databases, AI services, and storage that can be used to build, deploy, and manage web applications. With Azure, businesses and developers can scale resources as needed, only paying for what they use, making it cost-effective. It supports multiple programming languages and frameworks, allowing flexibility and integration with various tools.
Azure provides secure, reliable, and scalable cloud infrastructure, ensuring data protection and disaster recovery. It is suitable for businesses of all sizes, from startups to large enterprises, and is used for hosting websites, running enterprise applications, data analytics, and more. With global data centers, Azure ensures high performance and availability.
In short, Azure is a powerful and versatile cloud platform that helps businesses streamline operations, reduce costs, and innovate faster in the digital age.
Why You Should Have an Azure Free Account?
Microsoft Azure Cloud is like a huge online toolbox that helps people and businesses store their data, build websites, host apps, and run programs on the internet instead of their own computers. It offers services like virtual computers, databases, and even artificial intelligence (AI).
You can think of it as a place where you can borrow the tools you need to create and manage apps or websites without buying expensive equipment. Azure is easy to use and supports many different programming languages, so anyone from beginners to experts can use it to solve problems and build cool things in the cloud.
Before we jump into the steps, let’s talk about why you should signing up for an Azure free account and what you will get.
- $200 Free Credit
Get $200 worth of credit to spend on Azure services in the first 30 days. This allows you to try various products without any cost. - Access to Over 25 Free Services for 12 Months
After signing up, you’ll have free access to many of Azure’s top-tier services for a year, such as Virtual Machines, Storage, Databases, and more. - Always-Free Resources
Some services, like Azure Functions, AI tools, and security features, remain free forever, helping you continue using Azure at no extra cost. - Learn and Experiment Risk-Free
Azure’s free tier is a great opportunity for developers, students, and small businesses to learn cloud technologies and experiment with building apps or managing data. - Future-Ready Cloud Platform
Azure is one of the leading cloud platforms in the world. Registering gives you a head start in gaining hands-on experience with cutting-edge cloud solutions.
What You Need For A Free Azure Account?
In order to create a free Azure account, you only need three things:
- A Credit Card – This is required for verification, but don’t worry, you won’t be charged unless you upgrade or go beyond the free limits.
- An Email Address – You’ll need a valid email address to sign up.
- A Phone Number – Microsoft Azure will use this to send a verification code.
If you already have a Microsoft account, like one from Outlook.com or Hotmail.com, you can use that same account to sign up for Azure. There’s no need to create a new one!
How To Create Free Azure Account Without Credit Card?
If you don’t have a credit card, you can still create a free Azure account by signing up for Azure for Students.
All you need is a valid student ID and email address from your college or university. Just use your school email to register, and you’ll get access to Azure app services without needing a credit card.
Step-by-Step Guide to Create an Azure Free Account
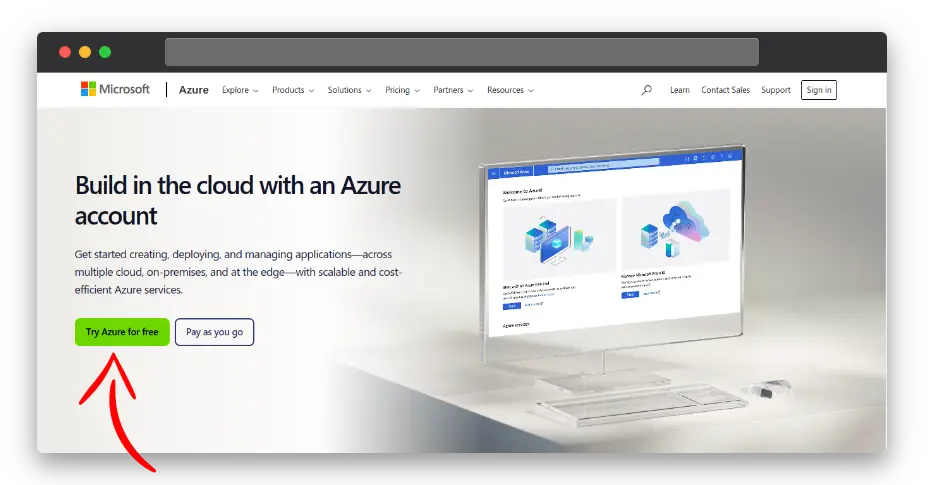
Step 1: Visit the Microsoft Azure Free Account Page
Head to the Azure Free Account page and click on the “Start for free” button to begin.
Step 2: Sign In or Create a Microsoft Account
Click on “Try Azure for free” button .
If you already have a Microsoft account, simply sign in. If not, you can quickly create one by following the “Create one!” prompt.
Step 3: Enter Your Personal Information
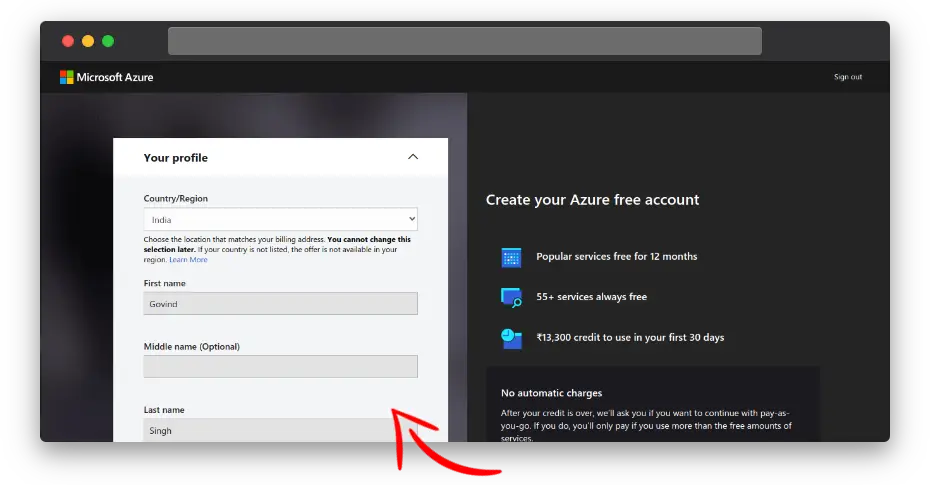
After signing in, you’ll be asked to provide some basic information such as your name, email, and phone number. Microsoft will likely verify your phone number via a text message or call.
Step 4: Add Payment Details
Even though it’s a free account, Microsoft requires payment information for verification purposes. Don’t worry! It will only charge $1 or less than that (depends on your region) on your card for verification purposes.
This amount is not actually charged and will be reversed once the verification is complete. You won’t be charged unless you exceed the free tier limits or manually upgrade to a paid plan.
Step 5: Identity Verification
Depending on your region, you might need to complete some extra steps to verify your identity, such as answering security questions or receiving an SMS code.
Step 6: Access Your Azure Free Account
Once your account is verified, you’ll be redirected to the Azure portal where you can start exploring the services available in your free account.
You can also access Azure portal using this link: https://portal.azure.com
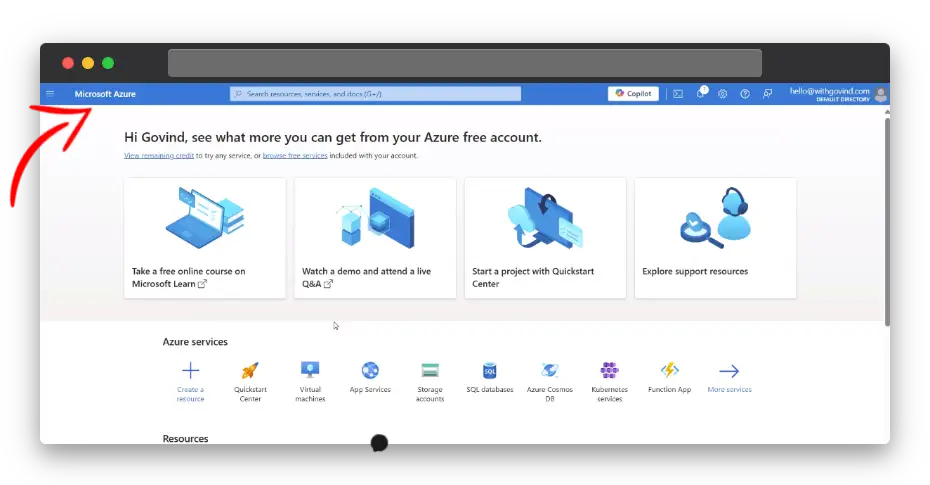
Now that you know how to set up your free Azure account, you’re all set to start using it! Enjoy trying out the different tools and services without spending any money, and have fun exploring what Azure App Services can do!
Watch Video Tutorial on YouTube
Watch the video version of this tutorial on YouTube for an easy-to-follow guide.
How to cancel Azure Subscription
If you’ve run out of credits and don’t want to switch to a Pay-As-You-Go plan, follow below steps to cancel your Azure subscription and stop any further charges.
Step 1: Log in to the Azure Portal.
Step 2: Go to “Subscriptions” or search for “Subscriptions” in top search section and choose the subscription you want to cancel.
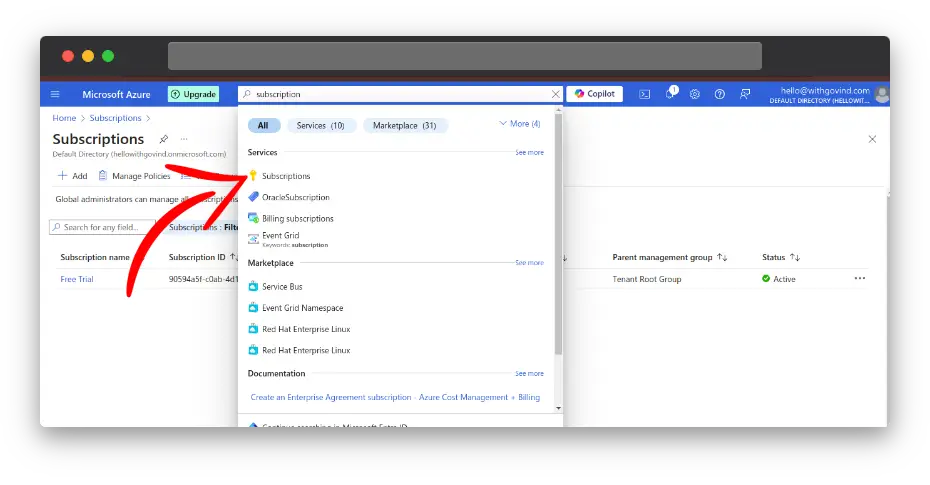
Step 3: Click on the “Overview” tab, then select “Cancel Subscription.”
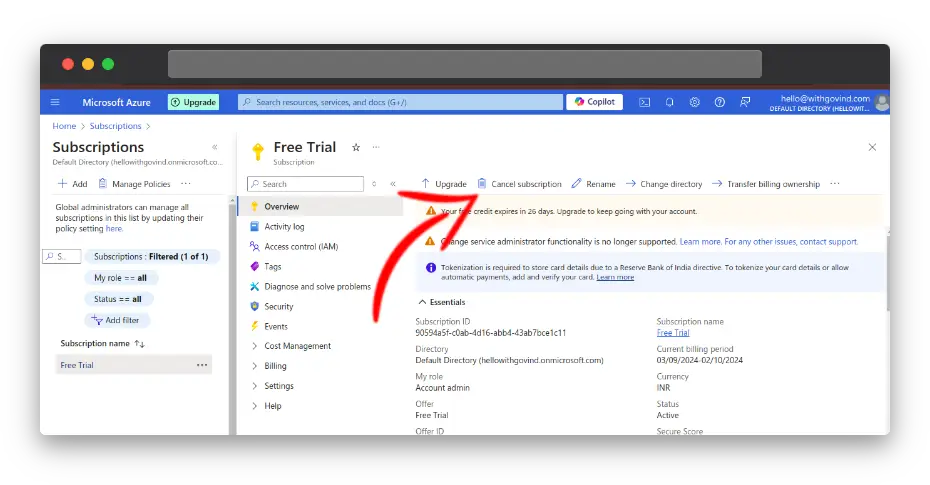
Step 4: Select a reason for cancellation from the drop-down menu and proceed.
Step 5: Select “Turn off my resources.” in the details box, check the box to turn off your resources, and click “Cancel Subscription.”
Step 6: Once the cancellation is successful, you’ll see a message saying “Subscription was canceled.” It may take up to 15 minutes for the status to update.
Wait 10-15 minutes for the changes to reflect, then go back to the cancelled subscription to see a notification confirming the cancellation.
Frequently Asked Questions
Is the Azure free account really free?
Yes! You receive $200 in credits for the first 30 days and access to 25+ free services for up to 12 months. You won’t be charged unless you exceed the free tier limits or manually upgrade to a paid plan.
What happens when my free trial ends?
After 30 days or once your $200 credit runs out, you can continue using the services in the free tier or upgrade to a Pay-As-You-Go plan.
Can I create multiple Azure free accounts?
No, Microsoft prohibits the creation of multiple free accounts. Violating this policy could lead to your account being suspended.
How do I cancel my Azure subscription after using up my free credits?
To cancel your Azure subscription, log in to the Azure Portal, select your subscription, and choose “Cancel Subscription.” This will stop any further charges if you don’t want to switch to a Pay-As-You-Go plan.

